I was a bit hesitant to write this post, because I feel that this is a good example of when I made something that should be simple, difficult. I’m usually decent with learning new technology and new platforms, but for some reason I had the hardest time assigning new assignments in Google Classroom. I ended up forcing myself to stay late on Friday after school and watched a few Google Classroom tutorials on youtube. It didn’t take too long for me to realize what I was doing wrong, and with a little practice I finally got the hang of things! With a little more experimentation over the weekend, I officially gave my first Google Classroom assignment.
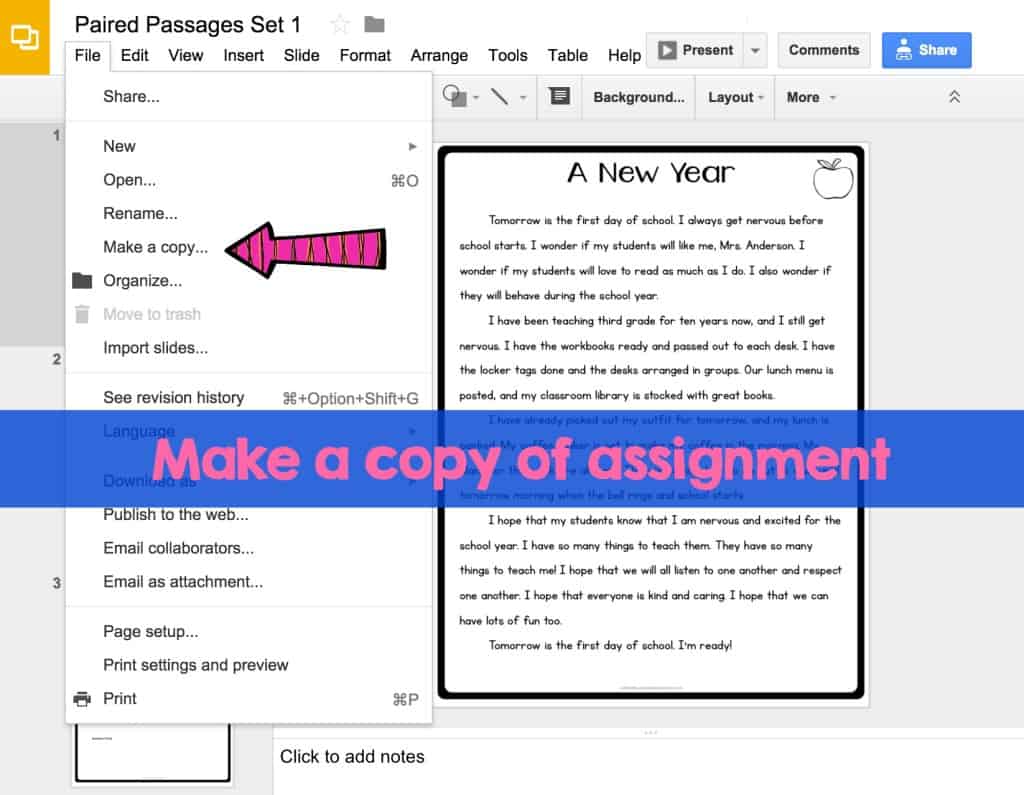
The first step is to make sure you have the assignment you need in your Google account. My files are grouped together by unit or product, and I don’t want to assign an entire unit or product to my students. I prefer Google Slides, because it’s easy for me to manipulate. Instead, I only assign the pages I want my students to complete. To do this, open the file you need. Click “file” and then “make a copy”.
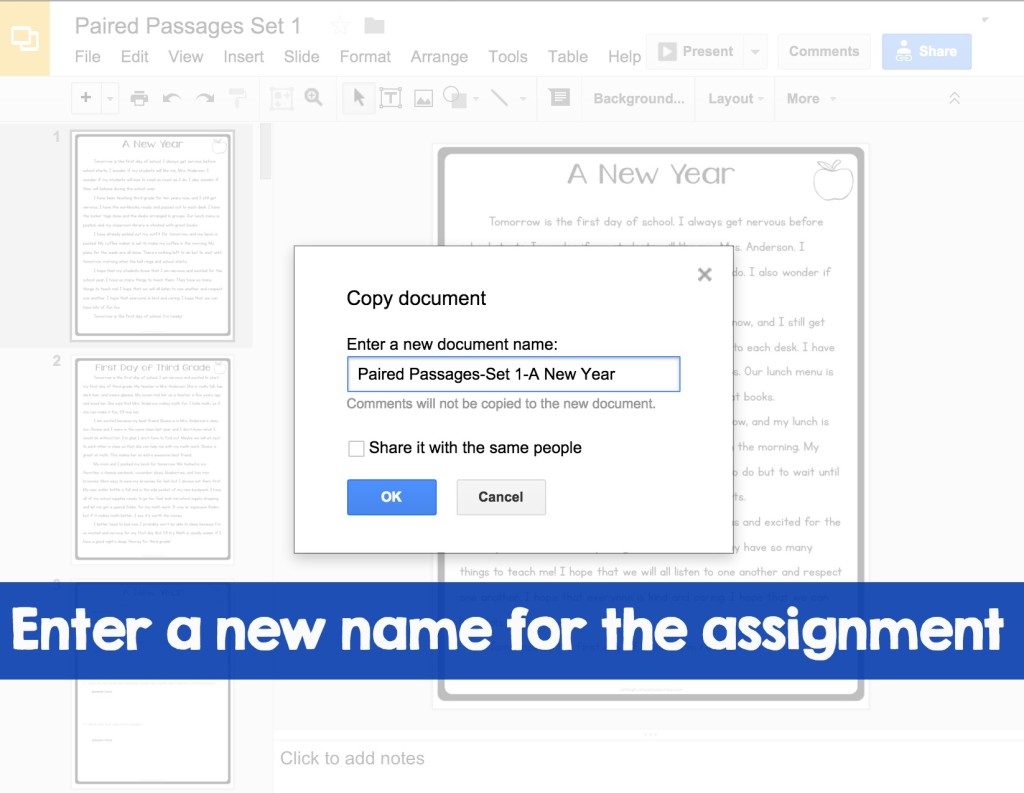
Then, you’ll be prompted to rename the assignment. I try to be consistent with how I rename assignments, so I can find them easily. One of my next projects is to learn how to organize assignments into folders.
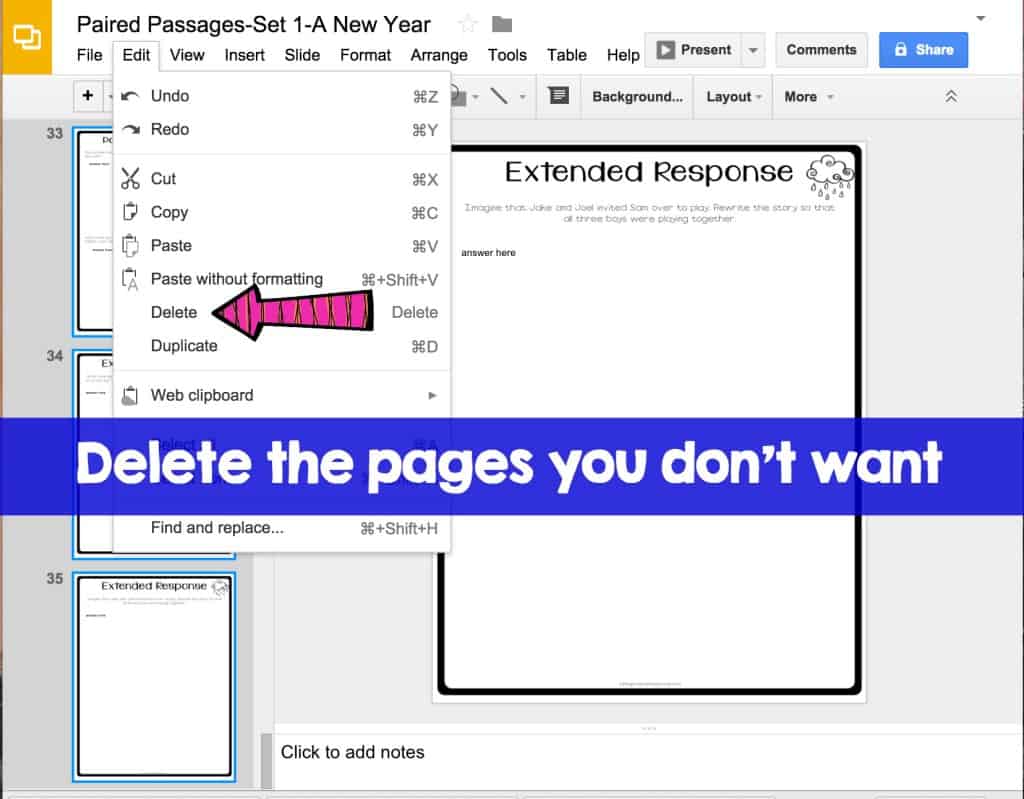
I then delete the pages I don’t want to assign to my students. Since this is a copy of the original, I won’t lose any of the actual document. I click on the first page I want to delete, scroll down, and then press shift and the last page I want to delete to highlight multiple pages at a time. This keeps me from needing to delete each page individually.
However, if there are a lot of pages, there’s an even faster way to assign just the pages you want. This video shares how.
I know that seems like a lot, but you can truly do all of the steps above in less than a minute! Now it’s time to use Google Classroom to set up the assignment. Click on the plus to create a new assignment.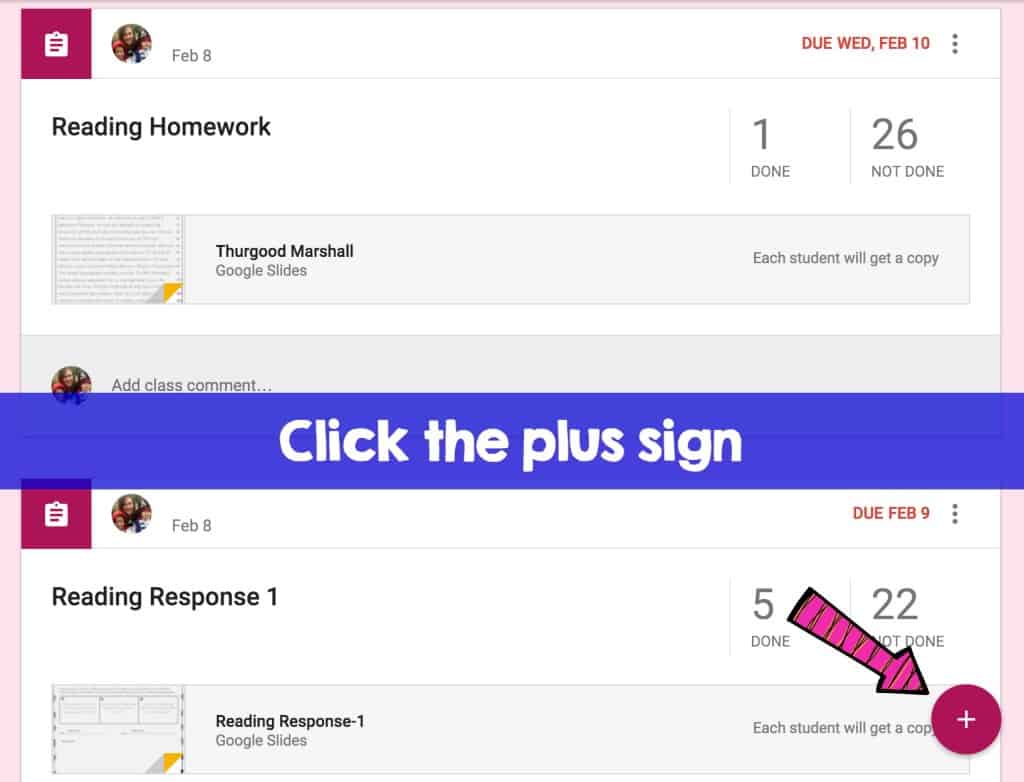
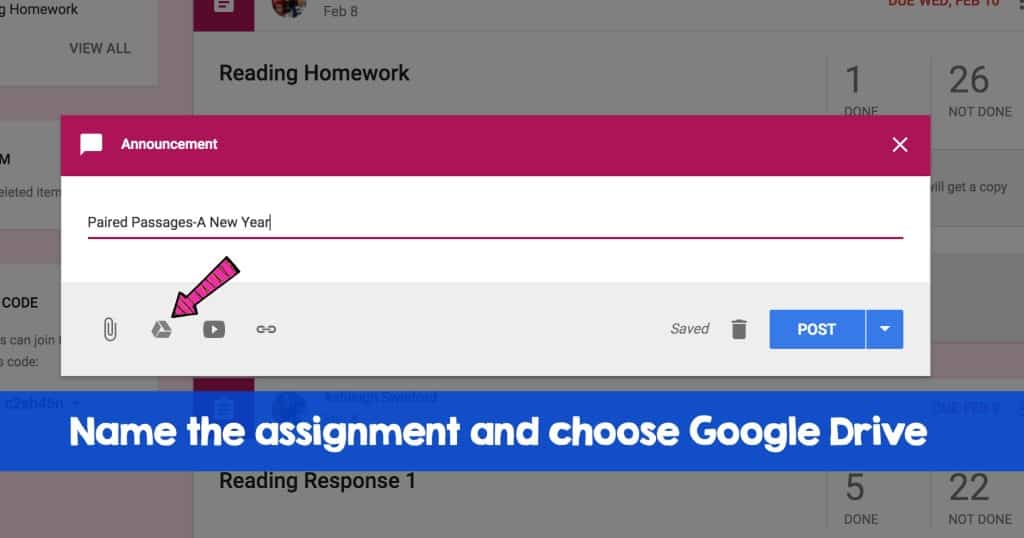
Give the assignment a name-this is what you students will see. Then, select the Google Drive icon.
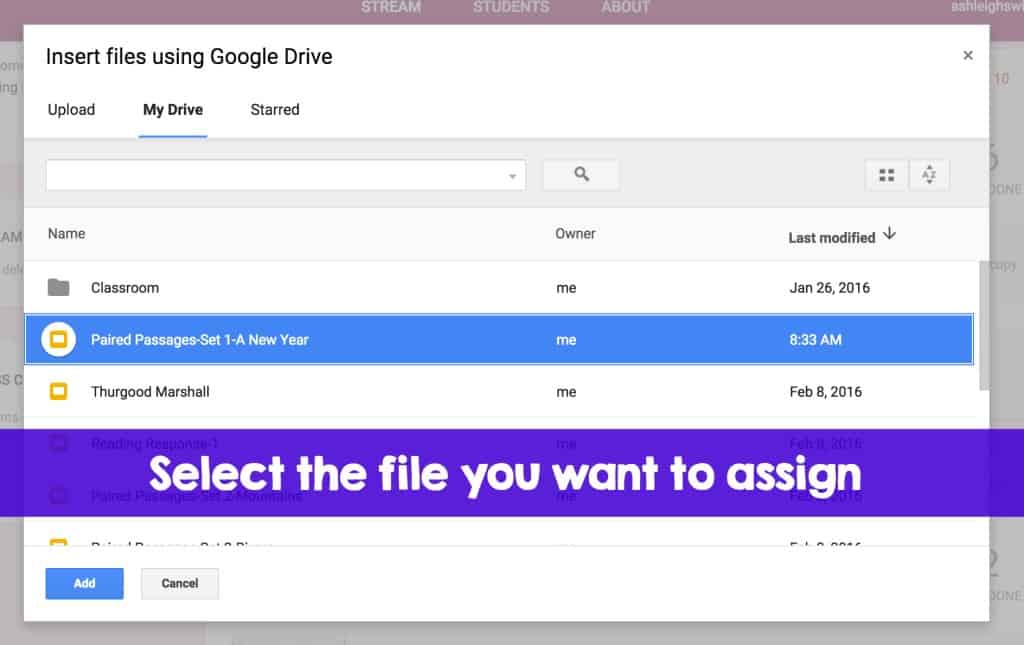
Select the file you want to assign. They popup automatically and are usually listed in order of the last modified assignment!
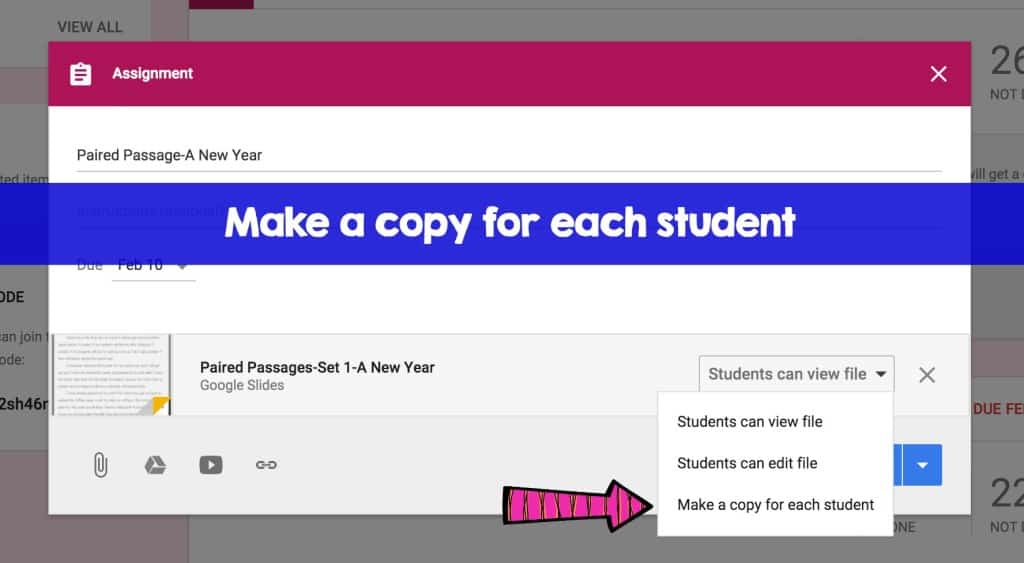
This is where I kept messing up. Before you assign the assignment, be sure to use the dropdown menu to select “make a copy for each student”. This is where the magic happens and each student is given their own copy of the assignment.
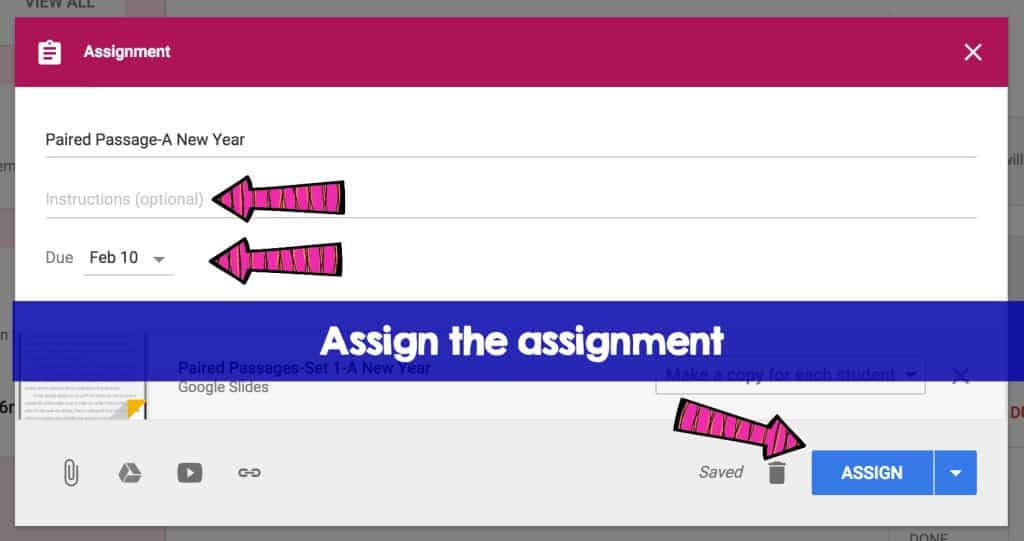
You can add specific instructions if you’d like and give the assignment a due date. Then, all that’s left is to select “assign”. You’re all ready!
You can then view the assignment in your Google Classroom account! You’ll be able to see who has started and completed the assignment. I’ll save grading and giving feedback for a new blog post!
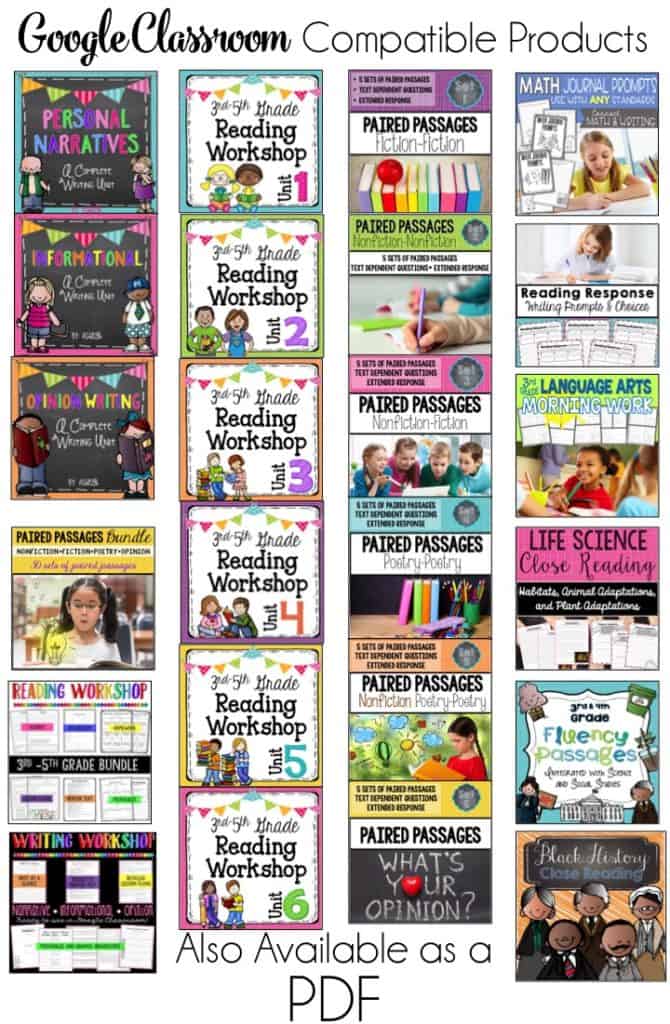
I’ve already converted several of my existing products to a digital version, so they can be used in Google Classroom and paperless classrooms. You can click here to download a PDF version for your convenience. You can click here to see these products in m TpT Store!

This is great! Thank you!
How do the students type on them?
I’ve inserted text boxes below each of the questions.